- Exploring the Demand for Twitter Accounts for Sale 07/05/2024
- Unlocking TikTok’s Potential – Why Buying TikTok Accounts Can Boost Your Earnings 05/05/2024
- Unleashing Marketing Potential with Bulk Facebook Accounts 13/03/2024
- Boost TikTok Livestream Views with an Efficient View Bot: Maintain Steady Viewer Count 01/02/2024
- Gmail Generators & Bulk Account Registration! Meet GmailCreator by Autobotsoft! 30/01/2024
- Searching for Affordable Static Residential Proxy Sellers 12/01/2024
- Exploring Instagram Account Creation with Gmail: A Guide to InstagramCreator Bot 10/01/2024
- Mastering Bulk Gmail Account Creation: A Comprehensive Guide with GmailCreator Bot 10/01/2024
How To Use Gmail Creator to Create Bulk Gmail Accounts
16/03/2022, 09:59:51
GmailCreator Software automatically Create Bulk Gmail Accounts
GmailCreator Bot will help users Create bulk Gmail accounts automatically, which not only saves users’ time and money, but is also convenient for those who are conducting YouTube marketing. It will address all issues that arise in creating a large number of Gmail accounts.
Outstanding Functions of Gmail Creator Software
- Create bulk Gmail accounts
- Support using Dcom or Proxies to change IP
- Autosave cookies and profiles to use on other softwares
- Auto Upload avatar
- Create YouTube channel
- Create Google Docs files, Google alerts, Watch YouTube Videos, etc. to gain trust for gmail accounts
- Integrate with many OTP providers for phone verification
- Export gmail accounts to many formats: Txt, csv, etc.
- Schedule creating bulk mail accounts running by the scheduler tool
- Import gmail from other sources to farm in Gmail Creator in order to gain trust for accounts
- Auto re-verify when accounts are asked for phone verification again.
Tutorial of Gmail Creator Software to create bulk Gmail accounts
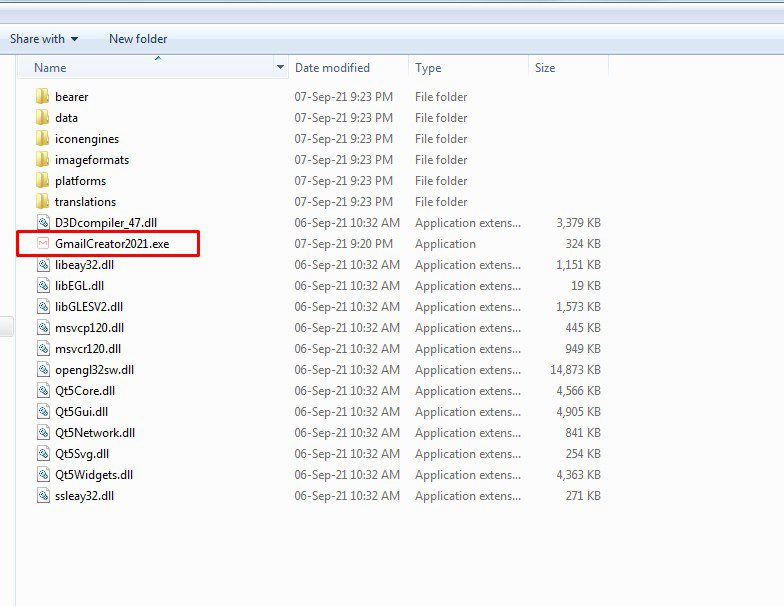
Download the software and all user-agent files (Desktop, Android, iPhone) which are sent to you when you buy the software. Extract (Unzip) the software and run GmailCreator2021.exe file to start.
Use the provided license username and password to fill in Login and Password.
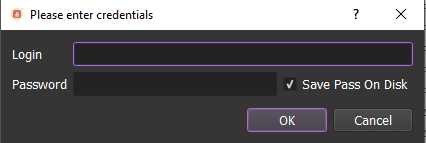
Click OK to login.
You will see two options as follow:
- Run Now: Run the software instantly
- Schedule application: Schedule the application to run at specific time.
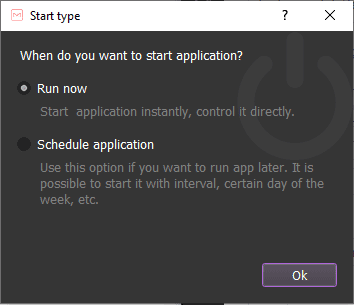
Choose one of two options above.
The following screenshot will show you all setting parameters of the software:
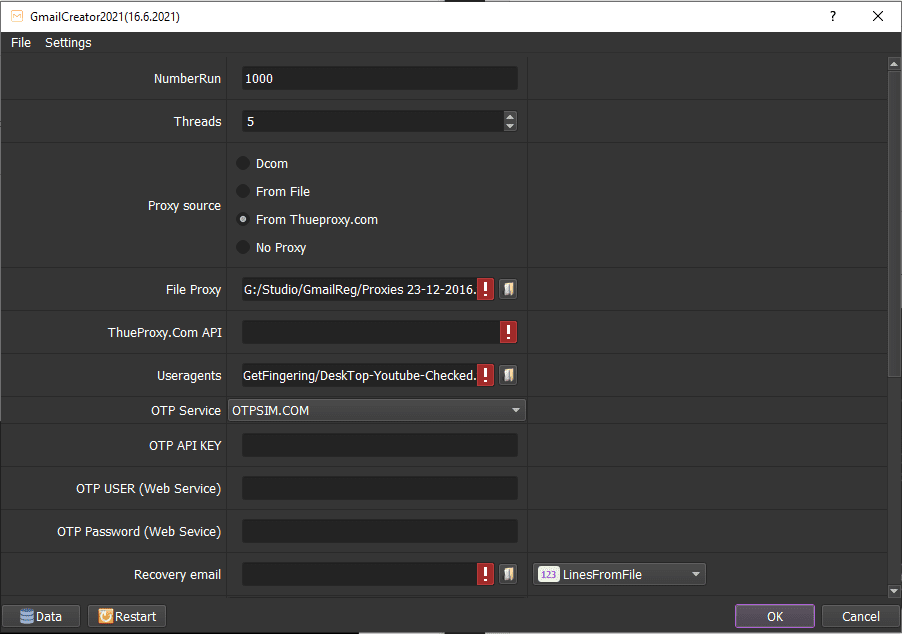
A – How to run Reg function (Create Gmail accounts in bulk)
This function is used to Create bulk Gmail accounts automatically.
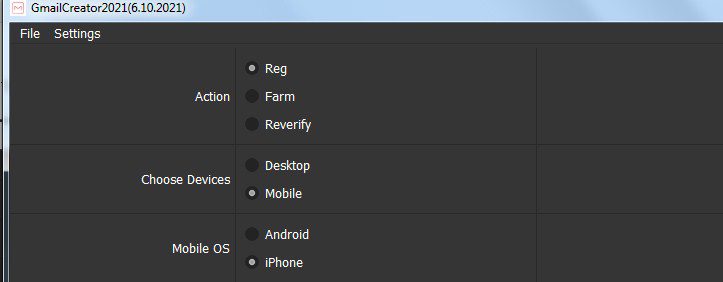
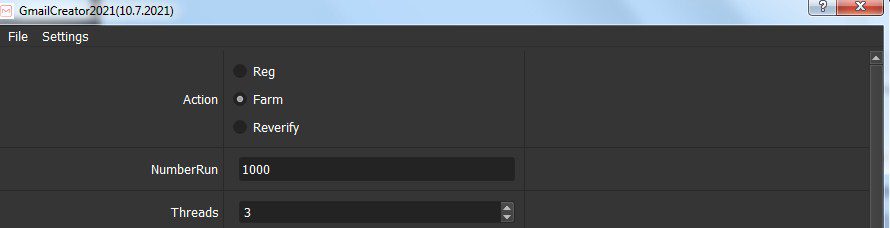
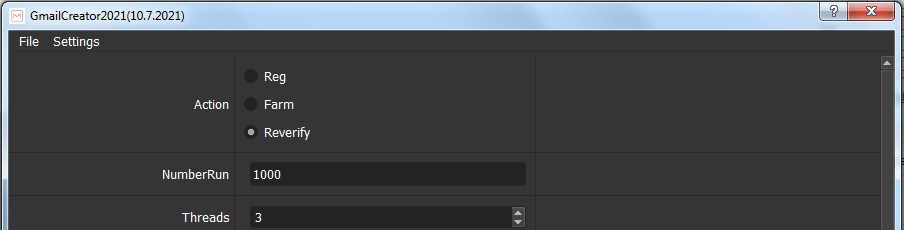
A1. Select Action
Select Reg function.
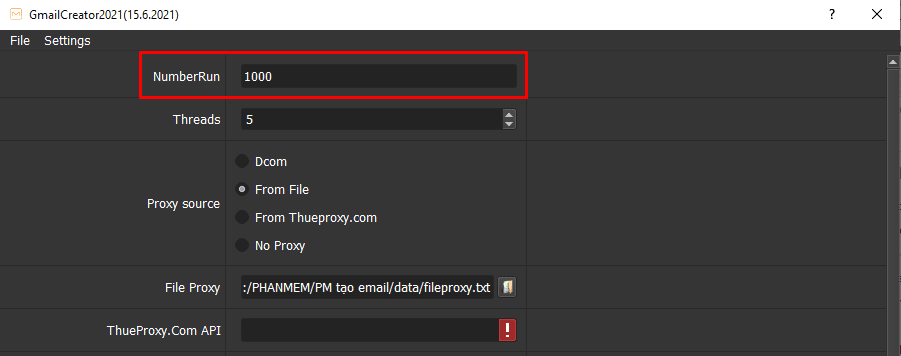
A2. Number Run (Number of Runs)
This is the number of times that you want the software to run, or number of gmail accounts that you want to create.
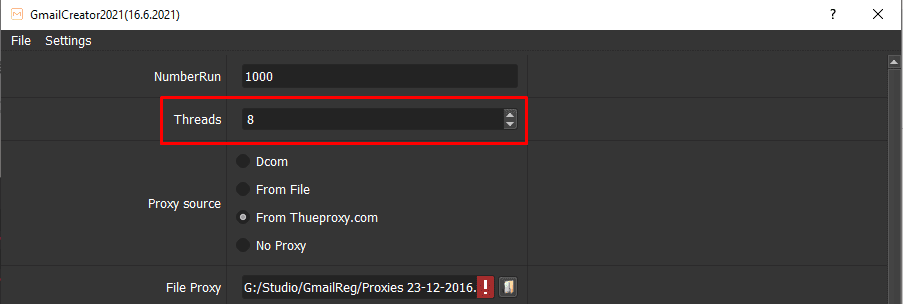
A3. Number of Threads
The number of threads is the number of tabs, accounts or windows that run at the same time.
Each thread will open a separate browser which has different fingering and IP. Provide number of threads that complies with your computer configuration.
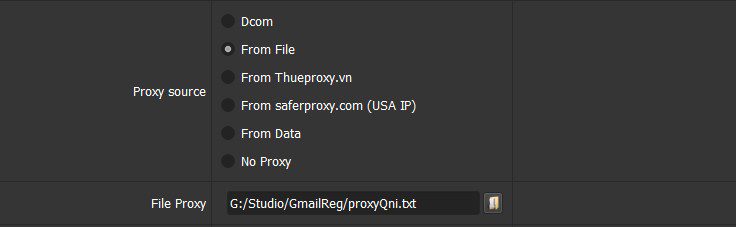
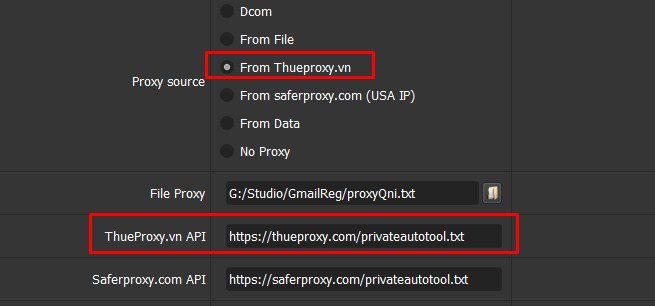
A4. Proxy Source
You can choose one of the following ways to change the IP:

A4.1. Dcom
You can use Dcom to change IP. After each registration, software will auto turn off and turn on the Dcom to change IP address. The limitation of using Dcom is that it only support one thread at a certain time.
A4.2. From File
If you choose using a proxy file, set it up as follows:
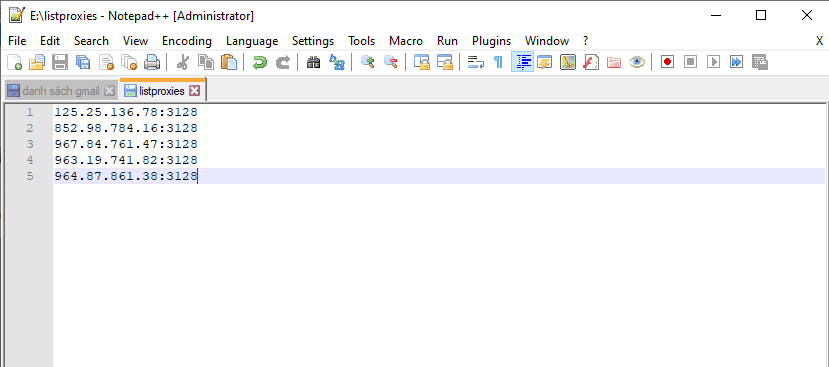
Put all proxies into a .txt file, each proxy per line in format: IP:Port:Username:Password. Leave username and password empty if your proxy doesn’t have username and password ( Some proxies work with IP authentication instead of using username and password).
Next, you choose  to select the proxy file.
A4.3. From Thueproxy.com and SaferProxy.com
If you rent proxy at Thueproxy.com or SaferProxy.com, just copy and paste their API into the Thueproxy.com API or SaferProxy.com API section.
A4.4. From Data
At Proxy Source, select From Data
The software will use proxies that were imported with Gmail accounts. Kindly refer to B2. Set Parameters.
A4.5. No Proxy
If you create multiple Gmail accounts on the same IP, your Gmail account will be banned. So this option should be only used to create the number of fewer than 10 Gmail accounts.
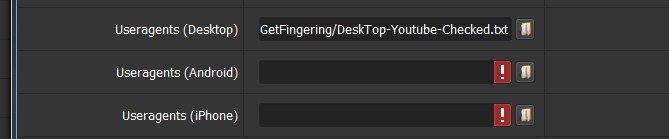
A5. Select Devices and relevant User-agents
You can choose to register with Desktop browsers or with Android/ iPhone browsers.
When purchasing the software, you will receive user-agents files. Put them into relevant fields.
A6. OTP Service
OTP is a code you receive via SMS message when you sign up for a Gmail account. When you register for Gmail, you will be asked for phone verification, the software will get verification code from OTP providers to verify automatically.
You can rent OPT at 5sim.net, chothuesimcode.com and codesim.net.
Note: chothuesimcode.com and codesim.net are OTP providers from Viet Nam. They provide the cheapest OTP in market (around USD 0.04 per code). For using Vietnam phone number on Google, you need Viet Nam residential rotating proxies which you can rent from thueproxy.com.
For international phone number, please use 5sim.net

After registering account at OTP website, get your API key and put it into the setting, then select the Country where you want to rent phone number.
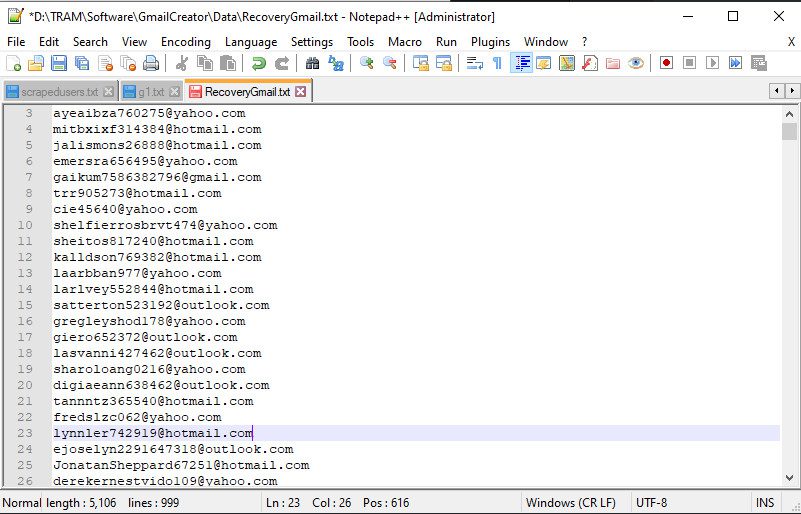
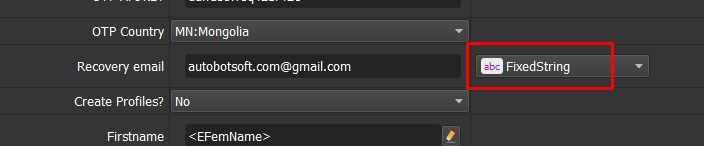
A7. Recovery Email
List the gmail accounts that are used as recovery emails into a text file. Select LinesFromFile then choose the recovery email file as bellow:

Note: you should not create bulk Gmail accounts with the same recovery Gmail because it may be considered spam by Google.
If you want to use a fixed email as recovery email (not recommended) please select FixedString and type in your recovery email.
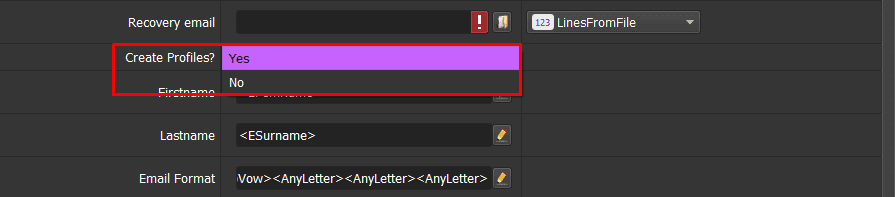
A8. Create Profiles
If you want to create Profiles, select Yes, otherwise choose No. This section is used to save profiles of gmail accounts which are used for other software supporting profiles without logging back in the accounts, like the software to increase YouTube views QniTubeAction.
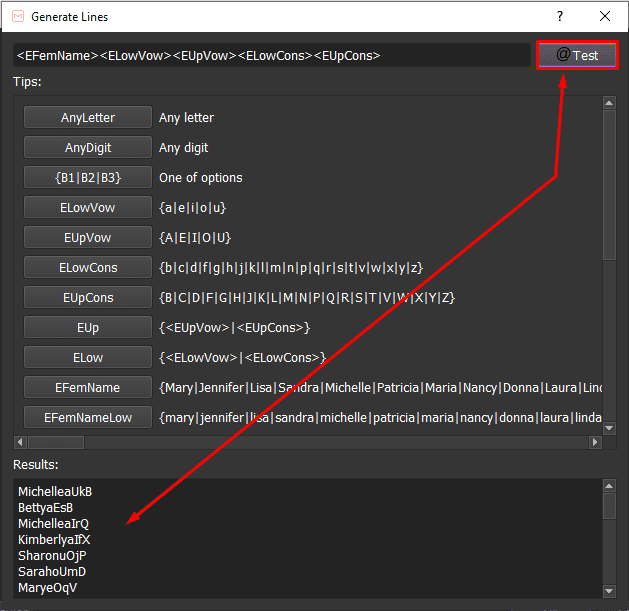
A9. Firstname, Lastname, Email Format, Password
The settings for these fields are similar. Follow these steps:
- Click
 , the system will display a dialog box as picture:
 - You can use spin-tax format {Hi|Hey|Hello} or you can use Predefined Tips. Click on Test button for previews.
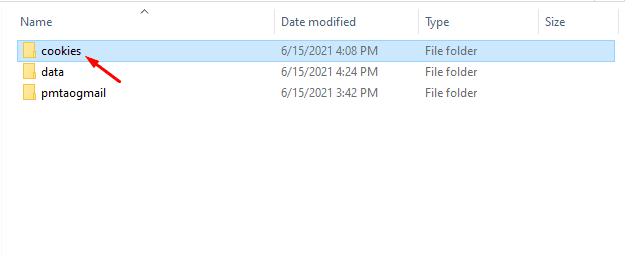
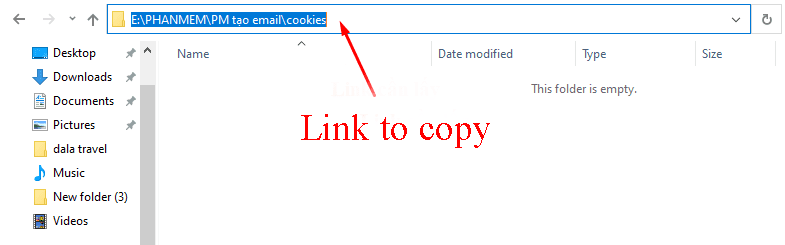
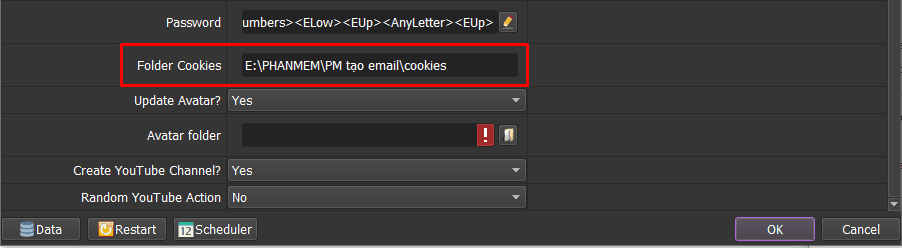
A10. Folder Cookies
Folder Cookies is a place where the software will store cookies and profiles of the accounts. Software will use cookies and profiles for the next runs without logging back into accounts. Create a new Cookies folder on any hardware disk that you want to save cookies and profile and get the path to put into the setting as shown
A11. Run the software to create gmail accounts in bulk
After setting all functions, click ok to run.
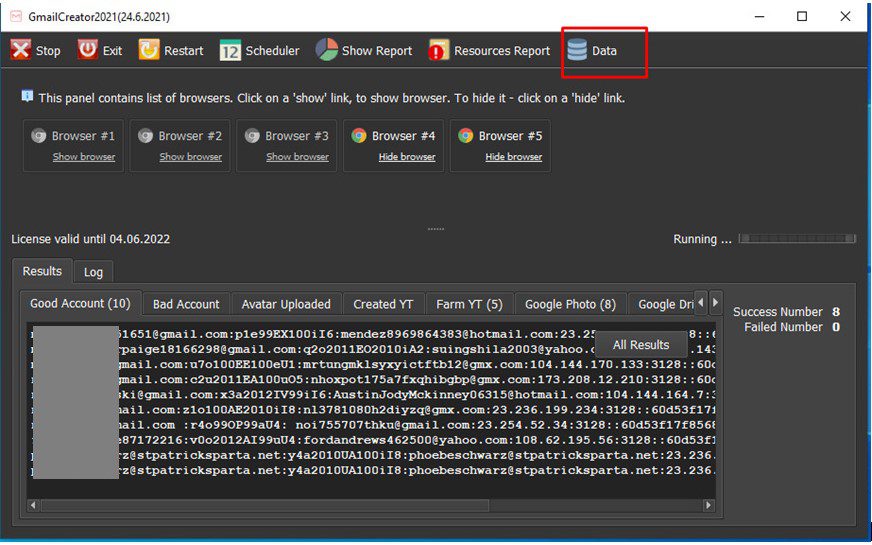
A12. Export Result
There are 2 ways to export result.
Method 1: Output file as “txt”. You click on “Result” ==> “All Result” to export the result file. Then you choose the folder to save the file.

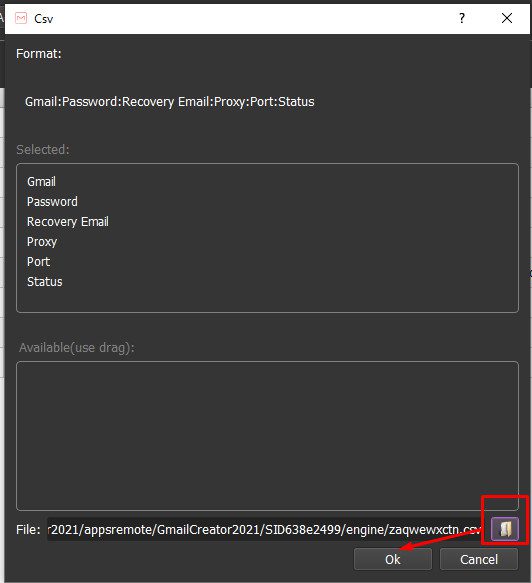
Method 2: Export the file. Select “Data” ==> “Convert” ==> “Export Csv”, you can do as picture below.
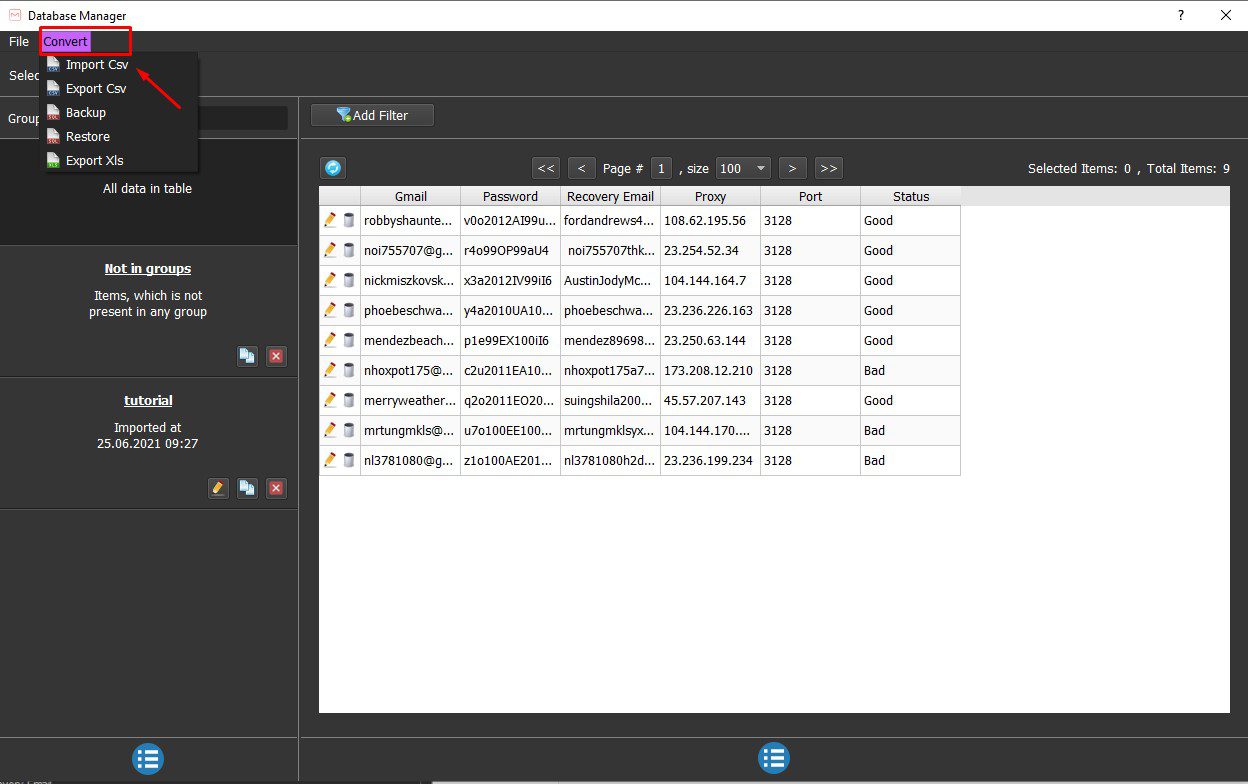
Then, click on ==> select the folder to save and name your file ==> Click “OK”.
B – How to run the Farm function (Farm Gmail accounts)
This function is used to farm Gmail accounts. You can farm the Gmail accounts that are created by Gmailcreator tool or you can import the Gmail list that you already have. The software will automatically create GoogleDrive, Google Alert, Google Map, Youtube channel, etc. and many other actions to increase the reliability of the Gmail account.
B1. Select Action
Select Farm
B2. Set parameters
You need to set the parameters as described in section A (Reg account), including the following parameters: A2 to A5, A8 and A10
In addition, you need to set up Farm Input to select or create groups of Gmail accounts to farm:

The Registered Gmail accounts when you run the Reg function will automatically save in Data. You need to select the group of accounts that need Farm to run.
For the Gmail account from other source, you can import it into the software to farm. First, you need to add these Gmail accounts to the software, follow these steps mentioned here HOW TO IMPORT DATA – IMPORT DATA INTO SOFTWARE (autobotsoft.com)
Note: The file which contains Gmail accounts includes: Gmail, password, recovery email, proxy, port. You import data as the Template.
B3. Farm functions
In case you select Mobile in Choose Devices section, the bot will run YouTube Channel and Send Mail activities only.
If you want the bot to run all activities, Select Desktop in Choose Devices section
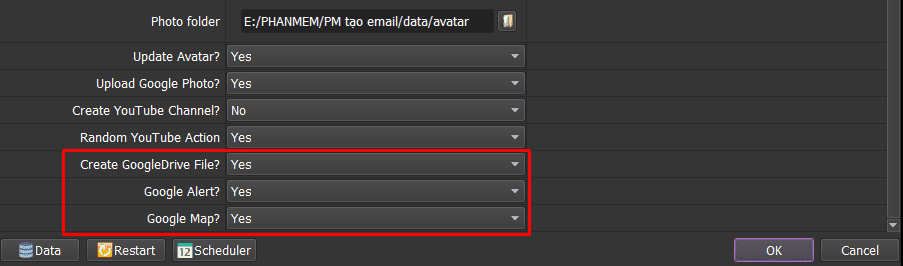
B3.1. Update Avatar
If you want to upload avatar for gmail accounts, select Yes. Otherwise, select No.
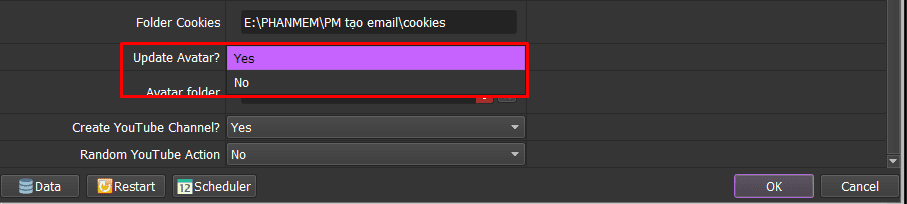
If you choose Yes, Select ![]() => choose the folder containing photos to upload avatar.
=> choose the folder containing photos to upload avatar.
Note: You should choose “Yes” in Update avatar once at the first time. Select “No” in this field from the second time.
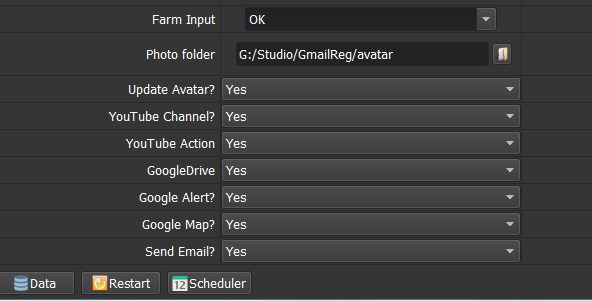
B3.2. Random Youtube Action
Run the feature to watch YouTube videos, like random videos.
B3.3. Create Google Drive Files, Google Alert, Google Map.
If you want to create Google Drive files, sign up for Google Alerts, visit Google Map… then select Yes, otherwise choose No.
After setting all the features, click OK to run.
B3.4. Run and output the results
Click OK to run, the software will perform the account farming functions. Gmail accounts with good or bad status will be listed in Data.
C- Instructions for running the Re-verify function to create bulk Gmail accounts
If the registration are required for phone re-verification as shown, you should run re-verify function. Although it costs money to rent a sim code, the quality of these Gmail accounts will be really high because the phone has been verified for the second time.
Important note: you need to create a new cookies folder on the software’s settings in order for the software to log into these gmail accounts again. If you use the old cookies folder, the software will not login again, it will load cookies for use, so it will not be able to check the status of gmail accounts.

Create new Cookies folder and put the path into the setting. All gmail accounts will be logged in again without loading cookies files.
Select the Reverify function from Action
Set the parameters as described in part A (Reg account), including the following parameters: A2 to A6, A8 and A10.
Select the Farm Input group including the accounts that need to re-verify the phone as described in section B2.
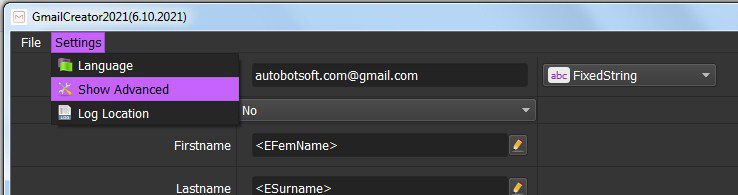
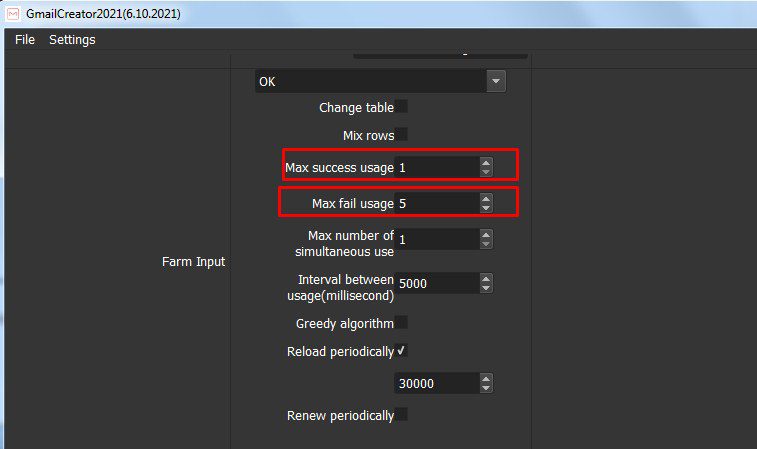
Go to Settings, Show Advanced
At Farm Input select Max Success usage = 1 and Max fail Usage = 5. It means each gmail account will be checked only one time (if success) and try again 5 times ( if failed)
Click OK to run the software that will re-verify these Gmail accounts. Re-verified Gmail accounts will have a Status of Re-verified Success in Data.

D- How to schedule a run by using the Scheduler tool to create bulk Gmail accounts
Select this function from the beginning. Or if you are choosing Run Now and want to schedule it, click the Scheduler button:

To schedule the software running, take following steps:
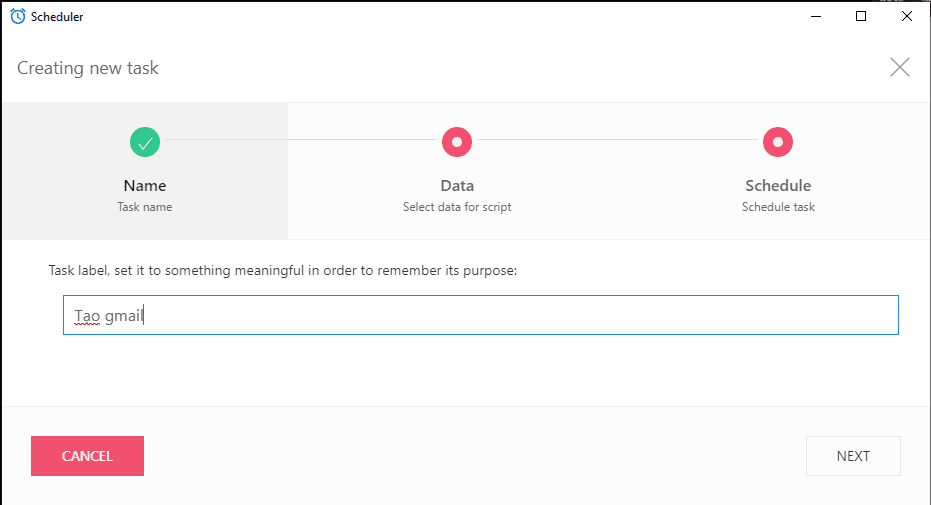
D1. Name
Enter a name for your campaign. Then click Next to set the Data item.
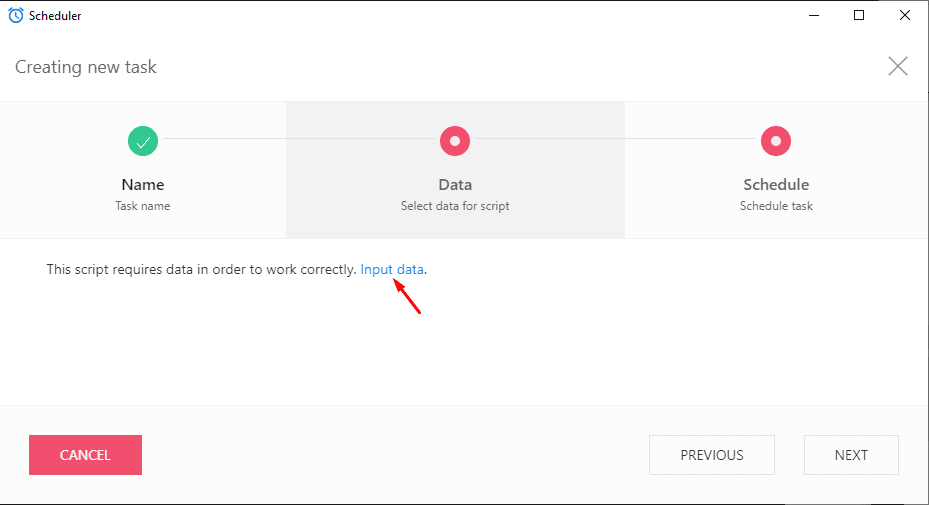
D2. Data
Click Input Data, the software will display a dialog box for you to install. You set up the same features as installing run Reg or Farm and select OK to save. Then click Next to continue.
D3. Schedule
Choose from the following time frames:
- Run Now: Runs after 10 minutes.
- Run at: Select Date not set to set the runtime.

Customize the runtime and click Save.
- Run with interval: Run periodically with a selected interval between runs.
Click on 30 minutes to set the time interval between each task start.
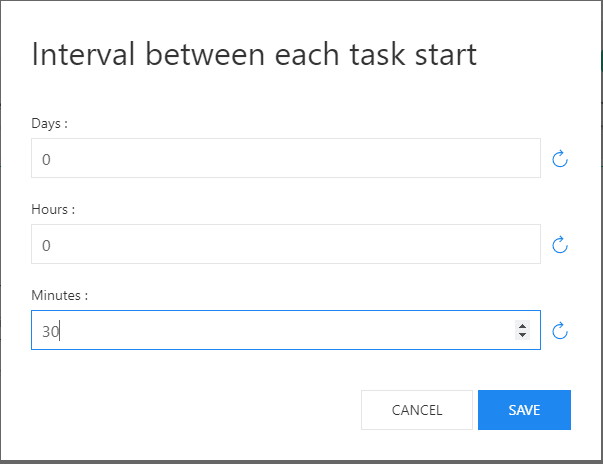
Click Save.
If you want to schedule a run, choose to set up a time frame similar to the items above.
- Start every day: Runs every day at the selected time.
- Start every week: Runs every week at the selected time.
- Set start time list: Run according to the list.
- Start every month: Runs every month according to the selected date and time.
- Sequence: Runs continuously.
Click Save and Close and your campaign will be saved.
Click ![]() to schedule more campaigns. The steps are the same as above.
to schedule more campaigns. The steps are the same as above.
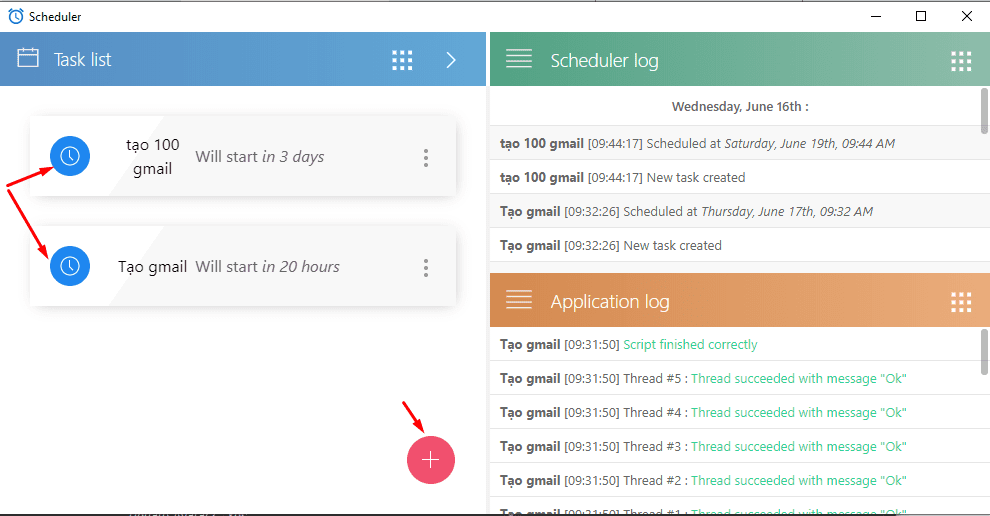
If you want to edit the parameters of installed campaigns, click on ![]() :
:
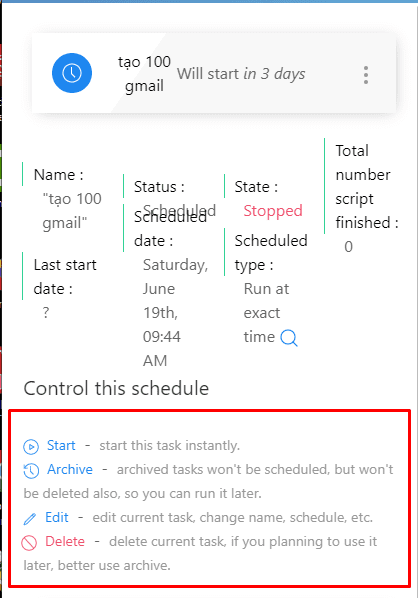
By the time you install it, the software will automatically run the campaigns.
E- Some notes for Gmail accounts to avoid being disabled
E1. You should not create more than 10 gmail accounts by sharing 1 recovery email. If you only have 1 gmail in the beginning, you should use this gmail as a recovery email to create about 10 gmail accounts. Then, you can use the newly created 10 gmail accounts as the recovery emails to create other 100 new gmail accounts.
E2. The gmail password should be set as the default with random password, you should not create multiple gmails with the same password.
E3. After finishing the Reg function, you should immediately run the Farm feature (Upload avatar, create a YouTube channel, upload Google photos images, create Google sheet files, etc.). You can clone the software folder into 2 folders: 1 folder is for running Reg (create an account), the other folder is used to run Farm. You can run these two functions at the same time and use the same cookies folder where contains the cookies for gmail created. In the Data section, select “Not in Group”. The software will take the newly created gmail accounts to run the farm function.
E4. For running Farm function: Click on Setting -> Show Advanced -> Set Max success of Farm Input as 3, Max fail as 10. Each gmail will be farmed successfully 3 times, it will stop if it fails 10 times . You should farm Gmail accounts once every 3 days.
E5. Newly created gmail accounts can be used to run YouTube views & Likes immediately, but you should avoid using them for running Subscribe to YouTube.
E6. How to handle when gmail accounts which are asked for phone verification at the second time?
After being created, a gmail account can be asked for the phone verification. You can use the Reverify function to verify it automatically. However, it is recommended to leave gmail accounts for about 10 days after being created, then run Reverify to ensure a permanent survival rate. After reverifying, you can use this gmail immediately without waiting for anything else.
Hope the article is useful to you. Thank you for following this post!
Contact info
Email: [email protected]
FaceBook: https://www.facebook.com/autobotsoftsupport
Skype: live:.cid.78c51cd4e7238ae3
YouTube: https://www.youtube.com/channel/UCGftS8E3vX7IaUwg4GgDWDQ
Twitter: https://twitter.com/autobotsoft
Tin xem nhiều


đăng ký nhận tin mới nhất
CÔNG TY CỔ PHẦN ĐẦU TƯ & CÔNG NGHỆ QNITECH
Chúng tôi trên
Copyright © QniTech
Kệnh đăng tin mua bán, ký gởi bất động sản uy tín nhất!